This is a Veteran Owned site
| |
||||||||||
Build A Gauge Block
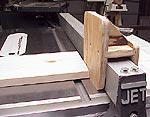
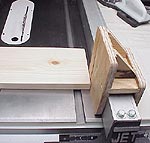
Simple, Safe and CheapText and photos by Tom Hintz I love jigs that are simple to build and serve a useful purpose in my shop. This gauge block is such a device. For years, woodworkers have clamped whatever piece of scrap was nearby to their fences to use as a gauge block. That works, but being the creative bunch that we are, a purpose-built fixture just seems like a better idea. And, we can improve on this idea a little. This gauge block is not secured by a clamp, instead using a simple thumbscrew to retain it to the fence. That eliminates having one end of a clamp on the work side of the fence, something that can occasionally cause problems, especially when trying to secure the gauge block near the edge of the table. Because this gauge block straddles the fence, it is easy to slide forward when setting the fence-to-blade distance, eliminating having to reposition the clamp each time. I have seen a few commercially made gauge blocks that employ hinges, pivots and other trick-looking devices to secure it to the fence. I felt that since this is a non-stressed jig, a simple thumbscrew would do the job while keeping the design simple so virtually anyone could build one quickly without having to buy excess hardware. Simplicity
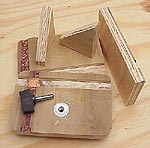
This gauge block was made to fit the JetFence on my Jet contractor saw. If you have a square or rectangular-shaped fence, adapting it for your equipment will be easy. Those of you with extruded fences have some engineering in your future. There are five pieces of wood in this gauge block, including two gussets. The only critical dimensions are the width of the cross piece and the location of the ¼" deep dados in which it fits. On square or rectangular fences other than the JetFence, these are usually the only dimensions that will need adjusting. All of the pieces were cut from 7/16"-thick plywood, but other (thicker) material can be substituted. Changing dado width to fit the stock will be necessary. Cross Piece
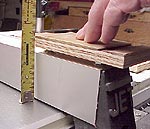
The Jet Fence has four bolt heads protruding from it's top and the gauge block has to clear them. I laid a small piece of plywood on top of the bolts and measured from its lower edge to the table top. With the dado located 3" above the table on the taller sidepiece, the gauge block misses the bolts by about 1/8". All of the sidepiece corners were rounded so the gauge block slides easily on the table surface and to reduce the chances of my skinning a knuckle on the top corners. The Thumb ScrewI used a ¼-20 T-nut to provide threads for the thumbscrew. Starting with a ¾" forstner bit, I drilled a recess on the inside face (short sidepiece) about 1/8" deep, and then changed to a 5/16" bit, to finish drilling the hole through the sidepiece.
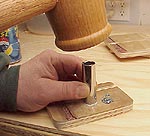
I dabbed a little epoxy around the outside of the recess and drove the T-nut in place with a 9/16" deep socket and a mallet. Some of the remaining epoxy was spread around the outer edge of the T-nut just to be sure. The thumbscrew is made from a ¼-20 bolt, cut to provide adequate length to accommodate the plastic knob, a jam nut and to insure it reached through the wood with about ¼" to spare. An option to the T-nut is to chisel a recess for a ¼-20 aircraft nut and epoxy that in place. Aircraft nuts resist loosening under vibration. So far, using the T-nut, I have not had any trouble with my thumbscrew loosening. The choice is yours, both work. Assembly
I used glue (Titebond II) and 1 ¼"-long drywall screws to assemble the Gauge Block to make sure it stays tight and square. Using the Gauge BlockThe only thing you have to remember when using this gauge block is to snug the thumb screw down when setting the cut width or using the block to space the work piece away from the fence. The thumbscrew lets you move the block quickly without the hassle of dealing with a clamp. I have a shelf built onto my table saw on which often-used accessories are kept. This gauge block has a permanent space on this shelf because I use it all the time. See our story on using Gauge Blocks - GO! Download a free plan set for this Gauge Block, our free sample of the NewWoodworker.com Custom Plan Sets. Do you have a comment about this page? - Email Me! Back to the Tips & Tricks List
|
All written, photographic and drawn materials are property of and copyright by NewWoodworker.com LLC 2000-2019. Materials may not be used in any way without the written permission of the owner.

