
This is a Veteran Owned site
| |
|||||||||
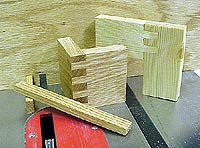
Box Joint Jig
Ancient, Effective and SimpleText & photos by Tom Hintz While many forms of jointery conceal end grain, there are times when the contrast exposed end grain provides is an attractive alternative. Box joints are a simple, economic way to produce such a joint. Best of all, you can build a basic table saw jig in your own shop, often with remnants from your scrap bin. This jig is not a new idea. It has been around for decades in various forms, this is one of the simplest. I have built several of these jigs but few worked properly. Recently I had an idea that helped get the critical elements aligned properly. That was the impetus for this story. The materials needed for this jig may vary somewhat based on personal preference. I like this jig to be five to six-inches tall to keep my fingers away from the blade and support the work piece adequately. I also like a width of around 18 inches, again for safety and support for larger pieces.
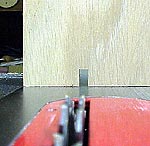
Common box joint spacing dimensions are ¼, 3/8 and ½-inch. I like the 3/8-inch size, but any of them may work well for your application. Box joints look and work best when the width of the joint is divisible by the width of the individual joint fingers. If you use ¼-inch spacing, the width of the joint can be from ¾-inch to whatever width you like. The key is using stock at least three times the width of the box joint fingers. This allows one finger on one piece to be captured between two on the other. It is important that the dado be cutting the correct sized groove. Be sure to make a test cut and measure the groove width. You may have to shim the dado stack slightly to get the proper width. This is common and does not mean something is wrong with your dado set. First, cut material for the indexing pin and spacer "stick." Take care to get the thickness exactly right. I have found it easiest to rip a piece slightly oversize, then either plane or sand it to the correct dimension. It is also important for this piece to be square and straight. Make this strip long enough to yield at least one piece for the spacer stick two or three inches taller than your fence and another two to three-inches-long for the indexing pin. In this case, I used 3/8 X ¾ X 12 inches for the dimension, and then cut the spacer stick and indexing pin from it. Next, cut the material for the fence. I used ¾-inch plywood because of its strength and resistance to warping, but any solid, straight lumber will work. Attach the rough-cut jig to the table saw miter gauge (make sure it is 90-degrees to the blade) with screws. Most miter gauges already have through-holes for screws built in. Make sure the jig fence extends beyond the blade a few inches to support the work pieces on the out feed side. Install the dado blade; it's width matching the pin stock. I set blade height to just over ¾-inch, the thickness of the stock being machined. If you are using thicker or thinner stock, blade height and the height of the indexing pin will have to be adjusted accordingly. Setting the blade a little high for the material being used cuts 90-degree fingers that protrude slightly when assembled. It is much easier to sand the pins flush than shave down the sides of a project. Start the saw and carefully pass the jig over the blade to make the initial cut, and then shut the saw off.
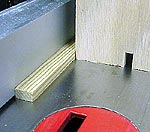
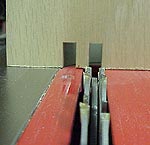
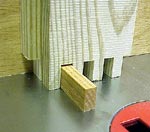
With the jig still attached to the miter gauge, move the table saw rip fence so it contacts the right side of the jig and lock it down. Cut a gauge block exactly twice the width of the pin. Remember, this is also the exact width of the dado setting. For example, the pin for this jig is 3/8-inch-wide so the gauge block was cut to exactly ¾-inch wide. Remove the screws holding the jig to the miter gauge, (mark the holes to avoid confusion later) and then insert the gauge block between the locked rip fence and the jig. eattach the jig fence to the miter gauge in this new position, making sure it remains in contact with the rip fence and gauge block. Move the spacer block and rip fence out of the way and make another pass through the dado blade to cut the slot for the indexing pin. Remove the screws and mount the jig in its original position. Carefully glue and screw the indexing pin into this slot, projecting forward and making sure it is square to the face of the jig face and the saw table. The spacer stick cut earlier should fit between the indexing pin and the blade path slot. To finish the jig I radiused the upper corners and eased all exposed edges with a ½-inch roundover bit. The jig was then sanded and finished with Danish oil. After letting the finish dry, the jig was ready to use. If you are unfamiliar with using a box joint jig, see our companion story, "Using the Box Joint Jig. |
|||||||||
Do you have a comment about this page? - Email Me!
|

All written, photographic and drawn materials are property of and copyright by NewWoodworker.com LLC 2000-2019. Materials may not be used in any way without the written permission of the owner.