This is a Veteran Owned site
Building a French Cleat
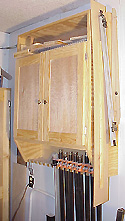
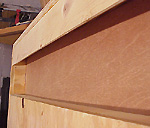
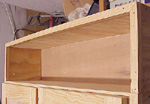
Simple, Strong and CheapText & Photos by Tom Hintz The French Cleat cabinet mounting system has been around longer than anyone can remember, and for good reason. It is simple, strong and cheap. In addition, the cabinet can be removed, leaving nothing more than two ¼ "-diameter holes to patch. There are many opinions regarding the material necessary to produce a good French Cleat. Some believe ¾" or 1"-thick stock is sufficient but I believe using 1 ½"-thick 2X4 material is a better, and stronger plan. The small amount of additional space required by the thicker material is taken from the rear of the top shelf, an area often unreachable anyway. Space RequirementsA French Cleat is usually attached to the underside of the top panel of a cabinet, running from one side to the other. A vertical area of about 5 ½" must be left open to allow the wall-mounted half of the cleat to engage the cabinet-mounted half. The French Cleat itself requires just over 1 ½" of area, measured from the rear edge of the cabinet forward. I add another ¼" and install a false back panel that conceals the French Cleat and prevents anything from slipping behind the cabinet. (See Diagram) Cutting a French CleatBefore cutting French Cleats, inspect the wood being used to be sure there are no cracks, splits or other damage that could weaken the cleat. Two pieces of standard 2X4 material will be needed. Cut one piece so it fits snugly against the top panel and both sides. The wall-mounted piece should be ½" to 1" narrower to make hanging the cabinet easy. Rip both pieces at 45-degrees, the fence adjusted to produce a long-side dimension of 2 ½". Using a hand plane or similar tool, remove approximately 1/16 to 1/8" from the sharp point on both pieces. This seems to make hanging the cabinet a little easier and insures the faces of each cleat half engage cleanly. Installing the French CleatThe cabinet portion of the French Cleat is glued and screwed to the top and sides of the cabinet. The long point of the cleat should be flush with the back edge of the cabinet, pointed downward.
The wall-mounted cleat is mounted with the sharp point away from the wall and pointed upwards. It is bolted directly to studs using lags with a minimum size of ¼"-diameter by 3 ½" in length. At least two bolts must be used, located so they engage two studs. Use a stud finder to be sure the studs in your wall are in fact 16" on center. Occasionally, especially with narrow width walls, the studs are framed on 19 3/16" centers. To get the cabinet placed as you want it, the holes for the lag screws may have to be "cheated" to one side or the other for them to hit the studs. The bolts should pass through the cleat at its thickest width. (See diagram) Drill a hole large enough to accept the bolt head and a flat washer, and deep enough to sink the head of the bolt just below the cleat's surface. Drill a ¼"-diameter hole the rest of the way through the cleat. Use a long level to mark the hole locations on the wall and pre-drill a hole into one of the studs. Install a bolt and washer and tighten it until the cleat is snug on the wall. Level the cleat and use the other lag hole as a guide to drill the second pilot hole. Install the lag with washer and tighten both securely. When the glue on the cabinet-mounted cleat is dry, you can lift the cabinet up, slip it over the wall-mounted cleat and gently lower it into position. Cabinet SizeI restrict cabinets hung with French Cleats to 36"-wide or less. The French Cleat could probably handle larger size but handling larger cabinets gets very difficult, and dangerous. |
||||
Do you have a comment about this page? - Email Me! Back to the Tips & Tricks List
|
All written, photographic and drawn materials are property of and copyright by NewWoodworker.com LLC 2000-2019. Materials may not be used in any way without the written permission of the owner.


