This is a Veteran Owned site
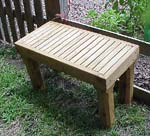
Garden BenchText, Photos & Design by Tom Hintz This is one of those projects inspired by a comment by the wife about needing something to sit on by her garden while doing various things associated with gardening. A small bench would fit the situation, as long as constant exposure to the weather would not kill it. MaterialsI already had a leftover 8-foot, pressure treated 2X4 that would supply the outer band. I also dug two 30-inch pieces of pressure treated 2X6 in my scrap bin from which I could cut the seating slats. All that was left was material for the legs. Since the bench would be used at the side of the garden, and the ground is always soft, stylish tapered legs would quickly become stakes as the bench sinks into the ground. Fortunately, I had not discarded the cutoffs when I built the garden fence. The stack of 18-inch long pressure treated 4X4s provided the support, and more importantly, the expanded footprint I needed. Working The Wood
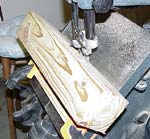
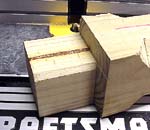
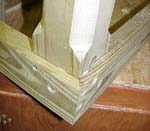
I started by figuring out the basic dimension of the project. Since this bench was essentially meant for one person I thought a 31-inch length would allow additional room for placing tools and such on the bench while sitting on it. Making the bench 15-inches wide would allow the entire outer band to be cut from the one 8-foot 2X4 and provide a comfortable sitting area. After sitting on other chairs and benches, and measuring their height, I arrived at an overall height of 18 inches. To break up the massive legs I cut 1-nch-wide flats at 45-degrees on each corner. Those flats stop about 1 inch below the banding. I also cut 1 inch deep by three-inch wide mortises in the outboard sides of all four legs. This would support the band and platform while keeping the legs about ½-inch back from the outer band perimeter. All of these cuts were made on the band saw. After cutting the 2X4 into rough lengths I moved to the miter saw, set at 45 degrees to make the finish cuts on the outer band segments. On the router table I cut rabbets ¾-inch deep and ¼-inch wide along the top of all four band pieces to support the slats. Back at the band saw, I sliced ¾-inch thick slats from the scrap 2X6 pieces. I left the slats 1 ½-inches wide, as they came from the 2X6 pieces. I then cut the slats into 12 ½-inch lengths, fine-tuned as I went to fit into the outer band rabbets. Each slat has a dab of Gorilla glue
(polyurethane) and a 1 5/8-inch galvanized deck screw at each end. The screws on the seating surface are counter sunk, plugged and sanded smooth to avoid catching rain or producing slivers. Since this is a strictly outdoor piece, I did not spend a lot of time sanding other than in the seating area. The seat and outer band were sanded with 100-grit paper to remove spurs and slivers produced during machining and gently smooth the surfaces. There was no attempt made to produce a "smooth" surface. Before placing the bench in the garden, a good coat of waterproofer was applied. Even though the bench totally pressure treated, the added protection was added to help control moisture absorption and the warping that will follow. Dimensions:Length - 31 inches Do you have a comment about this page? - Email Me! |
All written, photographic and drawn materials are property of and copyright by NewWoodworker.com LLC 2000-2019. Materials may not be used in any way without the written permission of the owner.


