This is a Veteran Owned site
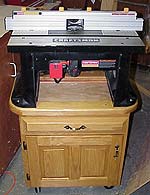
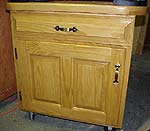
Router Table BaseText & Photos By Tom Hintz When I bought my new 3 ½-hp router the old router table I had been using was hopelessly obsolete. Back to Sears and a new Craftsman Industrial table was added to my inventory. The new router table is sold as a bench top unit but I wanted a more permanent and mobile solution. A little additional storage in the shop was also a plus. While I was designing my new router station, I took the opportunity to bring the worktable up to a working height that is more comfortable for me. The combination of 3-inch casters, 24-inch-tall cabinet sides and a 1 ½-inch-tall mounting collar, produced a table surface height of 43 inches. The mounting flange, to which the router table itself is secured allows you to tailor this base to your needs without major modifications to the plans. This flange also produces a closed well beneath the router table for keeping wrenches and other commonly used tools. I had also recently purchased a very nice raised panel door router bit set so considered myself "forced" to machine a raised drawer front and a twin raised panel door. I justified this kind of over-building of shop furniture by calling it practice for building kitchen cabinets for the wife. The Plans offer alternatives to these raised panels if you do not have that kind of tooling. Raised panels and the degree of finish on my router base may be a bit much for pure shop use, but I have always used building shop equipment as an opportunity to try new tools and techniques; and to practice those skills necessary for building presentable furniture in the future.
Do you have a comment about this page? - Email Me!
|
All written, photographic and drawn materials are property of and copyright by NewWoodworker.com LLC 2000-2019. Materials may not be used in any way without the written permission of the owner.


