This is a Veteran Owned site
| |
||||||||
Controlling Plunge Router Depth
Setting by exampleText and Photos by Tom Hintz Plunge bases expand the versatility of the already very handy router. While nearly all plunge bases have some type of depth control system, setting it with the accuracy we want can be a little difficult. The set-by-example procedure described here will be familiar to many veteran router users but can be welcome news for the novice. As with all woodworking machines and tools, proper setup is crucial to getting the best results. This set-by-example technique makes everyday router procedures fast, easy and very accurate. How It WorksThe set-by-example method is very useful when routing a dado or recess into which a piece of wood or hardware will fit flush to the surface. The key is using the piece the recess is being routed for, or a sample of it, to set the router’s depth rod. Often, a piece of scrap cut from the work piece during its preparation is much easier to use accurately due to the confined area surrounding the depth rod on some routers and the difficulty handling larger work pieces. Set the Baseline
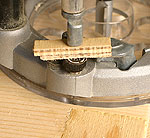
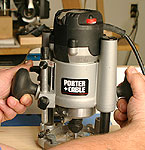
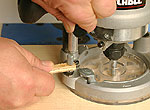
Install the appropriate router bit for the task and secure it in the collet. Raise and secure the plunge depth rod at its maximum height to get it out of the way for now. Set the router on a flat surface, lower the plunge housing until the bit touches the surface and then lock the housing in that position. Note: When using bearing tipped cutters like rabbeting bits, hold the router at the edge of the board so only the cutting edge touches the surface. You can also drill a hole in the surface large enough for the bearing to fit into to achieve the same thing. This establishes the "zero" or baseline setting where cutting actually begins. With the plunge base at this height, the actually cutting depth can be precisely set using the plunge depth rod. Once the plunge rod is set, the plunge housing can be returned to its full height. Set the Plunge RodMost plunge bases have a series of three or four progressively taller stops that the plunge rod contacts when lowered. Most often, these stops are on a turret built into the base itself. Some, like the Porter Cable 890-series base pictured in this story, use a rotating end on the plunge rod to select among fixed position stops. For this setup procedure, turn the turret or plunge rod end to select the lowest position. Hold the sample flat on the lowest position on the plunge base and then lower the plunge rod so it rests against the top of the sample. Lock the plunge rod at that level and double-check to be sure its end just touches the top of the sample. When satisfied with the plunge rod setting, the plunge housing can be released and returned to full height.
Now, when the router is plunged into the wood, the depth rod will stop the bit at a cutting depth equal to the thickness of the piece used to set it. You can check this setting by lowering the housing until the plunge rod contacts the stop and lock it. Turn the router upside down and place the sample next to the bit. The cutting edge should be flush with the top of the sample. Fixed base routers can be set using the sample against the bit but trying to do this with a plunge base requires at least one more hand than you have. Occasionally the recess is cut a bit deeper than the thickness of the piece being fit into it. This is common to fully hide the raw edge of a plywood panel or end grain. Adding a shim with a thickness on top of the sample equal to the depth below the surface desired sets the plunge rod correctly. Routing the Recess
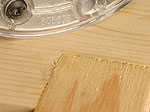
If the recess to be routed is more than 1/8"-deep, use the progressive depth stops on the router base to remove the material in 3 or 4 passes. It may take a little longer but substantially reduces the chances of a disastrous chip or tear out on a nearly finished project. Routing in stages is also easier on the bit and the router itself. The set-by-example method is very useful in a wide range of routing procedures. It takes very little time to learn and even less time to do but can make your routing more accurate without spending a single additional dollar. In fact, getting a setup right the first time is likely to save money by reducing errors and the scrap they generate. Do you have a comment about this page? - Email Me!
|
All written, photographic and drawn materials are property of and copyright by NewWoodworker.com LLC 2000-2019. Materials may not be used in any way without the written permission of the owner.


