This is a Veteran Owned site
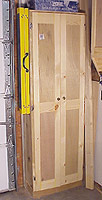
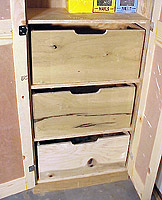
Tall "Shop" CabinetLow-buck storage and organizationText and photos by Tom Hintz The never-ending quest for shop storage space and a free corner spawned the design for this tall cabinet. After cleaning my shop out and planning the location of my new bench, I realized I had a small but useable space in a corner next to the garage door that could be used for enclosed storage. To keep this cabinet out of the way, it had to be relatively shallow and narrow, but it could be tall. The result is a 75 ½-inch-tall by 24-inch-wide and 11 ½-inch-deep cabinet. I could have gone taller, but the size of the plywood left from another project and wanting the top for open storage made this height good for my shop. As with the rest of my new shop cabinets, I built this one almost entirely from 9/16-inch-thick plywood. There are a few exceptions. The back is ¼-inch-thick plywood, the door panels luaun ply and the door frames, ¾-inch-thick pine. One of the storage problems to be solved with this cabinet was organizing supplies for common household needs that were previously scattered around the shop in cardboard boxes. Things like plumbing, electrical and general non-woodworking hardware needed their own, out-of-the-way place. The bottom three shelves of the new tall cabinet were dedicated to this purpose.
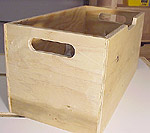
Three boxes, were built to fit on the designated shelves. Also built from the 9/16-inch-thick ply, I cut rabbets to glue and screw the sides of the boxes together. The ¼-inch-thick plywood bottoms float in a groove. Hand hold cutouts were made on either end plus another cutout was added to the front of each box to make getting them out of the shelf easier. The baseboard is made from ¾-inch-thick pressure treated wood in case water should get under the garage door in a storm. I installed a 1 -inch-wide face frame, again made from the 9/16-inch-thick plywood, to the front of the cabinet to make installing the doors easier. I find that even a small face frame helps simple doors be more effective at keeping sawdust out of the cabinet. The face frame was secured to the carcass with glue and my finish nailer shooting 1 ½-inch-long nails. All four corners are mitered, secured at those joints with glue only. The doors were made using simple tongue and groove jointery. These are very lightweight doors but I have used
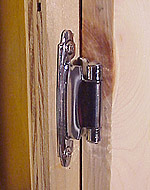
this construction for other doors in my shop with very good results. It's fast, easy, and produces a nice looking flat-panel door. In addition, I often can use scraps laying around the shop for at least some of the parts, which drastically reduces cost. Simple self-closing hinges, along with equally cheap round knobs finished the cabinet. I secured the cabinet to wall studs with 3-inch-long drywall screws just to be sure an uneven load on the upper shelves did not tip it over. This cabinet has been built by several other woodworkers who use it for other purposes than I originally intended. Some used better wood, added raised panels to the doors and use it in the kitchen as a pantry cupboard. Others upgraded the wood and use it in the family room to store video tapes, toys and other things. However you use it, this is an easy-to-build project that can be tailored to fit your needs just as easily.
Do you have a comment about this page? - Email Me!
|
All written, photographic and drawn materials are property of and copyright by NewWoodworker.com LLC 2000-2019. Materials may not be used in any way without the written permission of the owner.


